 This is a very long post with lots of pictures so if you're just interested in the turkey butchering go straight to the bottom.
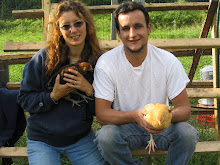
 And we absolutely did not butcher the tom you see here, even though his whole goal in life is to attack me. At least he has something to live for.
 Thanksgiving was really nice this year. Actually it's been nice every year of my life except maybe last year wasn't so nice what with my mom just getting out of the hospital the night before and my sister, Amy living in Georgia (she is home now).
I used this bottle of $3.98 wine for basting my turkey, the bottle was the prettiest of all the wines.
 I cleaned a couple of pie pumpkins and roasted the seeds. I found a recipe that calls for you to boil them for 15 minutes before you bake them with a little oil and salt, very good! Usually I don't like roasted pumpkin seeds but it seems that boiling them first causes the shell to soften slightly making them much crunchier after baking.
I ended up giving these to my chickens to eat. As I was taking them out of the oven my sister told me that my mom bought pies and I was so busy with everything else that I figured the chickens and turkeys would love them. I have another one that I'll cook up maybe for Christmas.
 I had no twine to tie up my turkey and after searching all over the house I finally found this light pull string, I cut off the metal tab things and it worked just fine.
 I figured it was a much better choice than this stuff, it might have weird stuff in it.
My turkey basting supplies, butter and the wine in the other picture. I always roast my turkeys the Martha Stewart's Turkey 101 way. Always delicious, never dry. Covering it with cheesecloth and basting every half hour with the wine and butter is the best.

All stuffed up and ready for the cheesecloth. Check out my helper in the background.
 Complete and ready for the oven. It was still dark outside when I took these pictures because I had a 27 pound turkey that had to be ready by 3:00 pm.
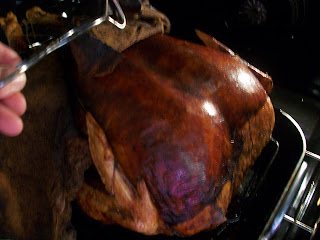
 This is about four hours into it. The cheesecloth really protects the skin from over browning before the rest gets done.
 Time to remove the cheese cloth and look how nice it is.
Another hour in the oven and it was perfect.

Yummy! Do you think my plate's full enough? I ate it all too.

He waited patiently for a bite, he got one too.
 Kevin got an early Christmas gift from Tom. An awesome knife engraved with his initials.
Unfortunately, he didn't get a deer yet so he hasn't tried it out.
 I collected dill that was growing at my back door and decided to dry it in case I need it for early pickles. I'm going to try to get some started early enough this spring so I will have fresh though. I couldn't find any last year until later in the summer. I'm going to try and grow some in a hoop house or something, maybe even a cold frame?
This was the motivation for my week of remodeling. I had scheduled half a week off after Thanksgiving when Kevin is off for gun week. He spent most of the week down south in a cabin so with the house empty I seem to get a lot done.

First, I painted the doors for my lower cupboards and hung them up.

I also laid down some tiles that were needed because when we took out the pantry there were spots that had the old tile under it. Plus I put down a wood border that replaced the old silver border that you can see in the picture above.

Here's the floor with the new tile and border. It still needs some finishing work but it looks way better that before. (Amy, call me and let me know how you think it looks. )
 Now, back to the reason for some of my work. All of the walls in the living area used to be this awful paneling. We eventually want to drywall but I had nowhere to hang my new decoration so I convinced Kevin to let me paint. He wanted me to wait until we drywalled but who knows when that will be and I needed to hang up my new decoration. It could be years.
Everything was so dark and dreary and dirty looking.
 First I primed. (Actually, first I filled all the holes and sanded and sanded!)
There was a really high spot and I had no ladder.
 So I improvised and stood on this stool on top of another stool, very lucky I didn't fall. When I put on the paint I taped a paint brush onto a extension pole and used that, it worked but if you get up close it might look bad.
 Lookin' better!
 Much better.
 Then I decided to go after the wall on the other side of the house.
I want to get new curtains now. Maybe just plain ones like you'll see in the picture of the sliding glass door. Soon I'll trim around the windows.

I also put down this carpet in the laundry room. The floor was terrible with mismatched tiles.

I then trimmed out the area over the sliding glass door and hung the curtains, not perfect but so much better!

This picture looks a little better. I really like these simple tab curtains and will hopefully get some for the other side of the room.
Turkey Butchering

Yep, it's you!

We normally use killing cones but they were not big enough so Kevin resorted to using feed sacks, worked pretty good too. You can see him in the background, he hung the bag with the turkey in it, cut them and they stayed really calm, slowly going to sleep. That's me and my MIL Kaye in the foreground.

Then the birds went into the scalder, they barely fit they were so huge.
 That's Kevin and his dad, Mike running the plucker. It was so nice to have their help for the day.
 The plucker was the best investment we ever made.
More scalding.

More plucking.
 Then getting the back end loose and ready to slide out.
All out and trimming the gallbladder from the liver.

Kaye's removing the lungs and I'm trimming the heart maybe or something.
 There's the gizzard.
Cutting it open to clean all the stuff out and remove the lining.

All done, this one weighed 27 pounds and it was the one we had for our Thanksgiving dinner.
Our photographer for the day was my niece Stephanie. It was her first butchering experience and she took lots of pictures. The next picture that she took was a little unusual but I thought I'd include it as a fitting ending to the day. It was how we all felt after lugging around 27 pound turkeys.
Beth


 Here is what the old cupboards looked like. These are not the same ones we tore out because I forgot to get a "before" shot but they are exactly the same. See how they don't go to the ceiling? I need that space! Plus, the shelves were only 10 inches apart. Barely enough room for a drinking glass.


 Complete,


 I don't think I've shown a picture of the lights we picked out. After watching a remodeling show we saw them use some pendant lights. We really liked them so we went to the local big hardware store and found these. Love them.

 UPDATE:

